
How does a cassette toilet work?
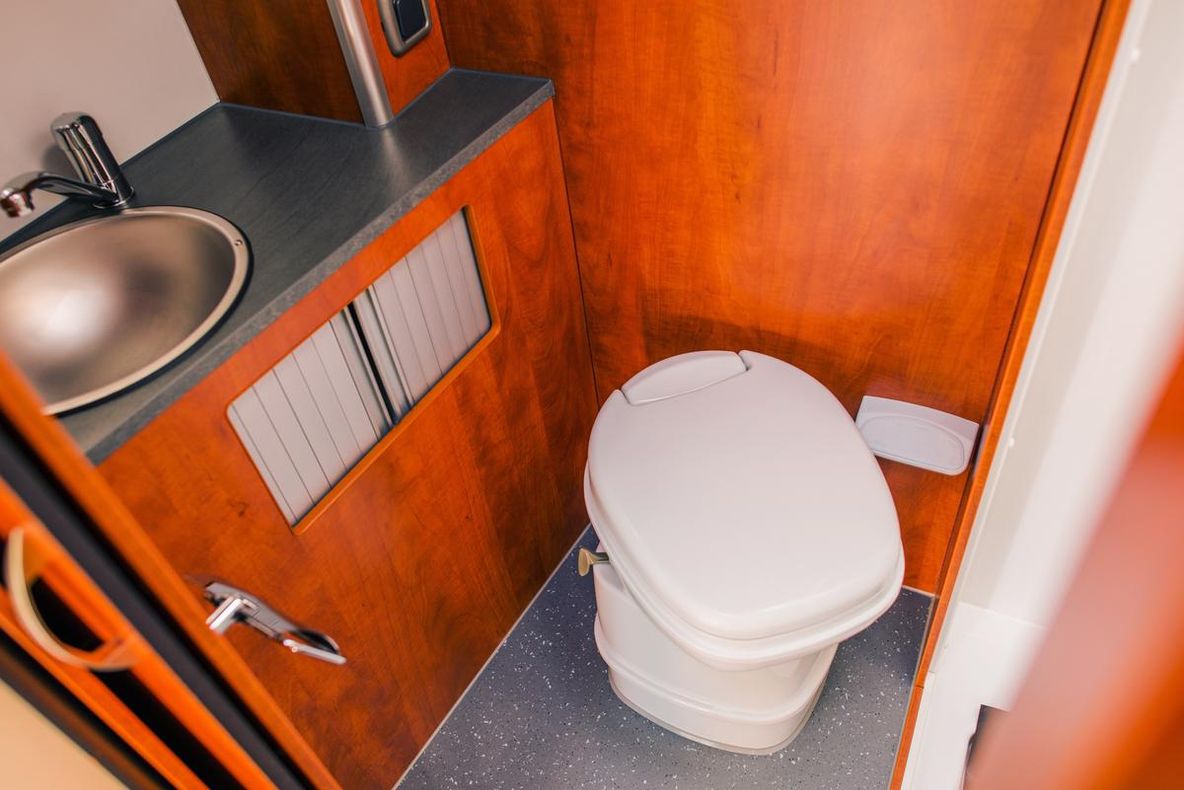
Most standard motorhomes come with an integrated cassette toilet. It’s hooked up to the water system, so it's ready for flushing at the push of a button. A valve closes off the toilet bowl at the bottom to keep unpleasant smells from spreading throughout the vehicle. Below the toilet is the cassette, a holding tank where waste is collected when the valve is open. Chemical substances are often added to prevent odours from forming. These chemicals simultaneously disinfect and help speed-up the decomposition of toilet paper and solid waste, which makes the process of emptying and cleaning the cassette easier in the long run. The cassette is usually inside a slide compartment that can be accessed from the outside of the vehicle, making it simple to remove and transport to the chemical disposal point.
How often should I empty and clean my cassette toilet?
There is no hard and fast rule as to how frequently a cassette toilet must be emptied and cleaned. You should empty the holding tank when the level indicator is red at the absolute latest. Experienced campers recommend that you don’t wait until the last moment, though: After all, the fuller the tank, the harder it will be to pull the cassette from the slide compartment and bring it to the chemical disposal point. If you're travelling as a pair, your tank will probably be full in about two to three days. If the temperatures outside are particularly high, such as in mid-summer or when camping in southern European countries, you'll want to empty the tank at least every two days. Since the holding tank is usually located on the outside of the motorhome, it’ll heat up dramatically in the sun, and when you open up the valve, unpleasant odours are practically guaranteed. You'll also want to clean it just as frequently if you decide not to use chemical substances.
For the environment: Dumping in the proper places
Waste from your cassette toilet should never under any circumstances be dumped outdoors or in household toilets. Chemicals could seep into the groundwater and significantly hurt the environment and its inhabitants. It also isn’t worth it because there are high fines for dumping outdoors. If you’re not spending the night on a campsite with a chemical disposal point, you should find out in advance where the next possible dumping station is on your route. You can find lists online that cover all dumping stations in Germany, as well as some throughout other parts of Europe.

Emptying & cleaning a cassette toilet in 8 steps
1. Inform your fellow campers and close the valve
To make sure that no mishaps occur, let your fellow campers know that they won’t be able to use the toilet for the next 20–30 minutes. Make sure to close the valve, so that the liquid can’t slosh about and flow into “nowhere”.
2. Put on disposable gloves and open the cassette holder
Make sure you put on a pair of disposable gloves before you start emptying and cleaning the cassette toilet. The access to the holding tank is almost always located on the outside of the motorhome and is usually locked. First, open the lock (if necessary for your motorhome) and then unlock the cassette holder by pressing both buttons on the door. The door opens automatically in a downward motion.
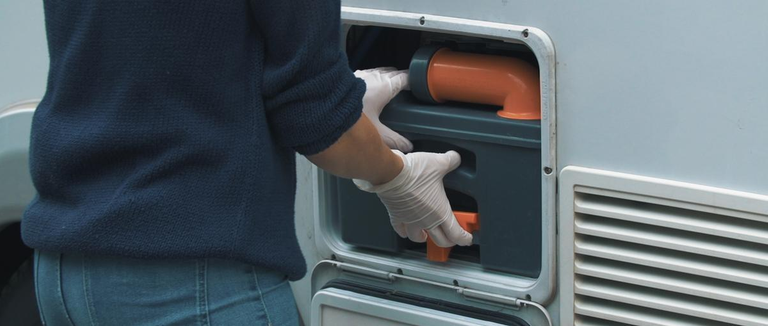
3. Remove the cassette
The cassette has a handle that is usually a different colour than the rest of the holding tank. To take it out of the motorhome, grab the handle, lift slightly and then finally use both hands to pull it out of the holder. The way to remove the cassette may vary depending on your vehicle, so give it a go. You’ll also frequently find instructions on the holder door.
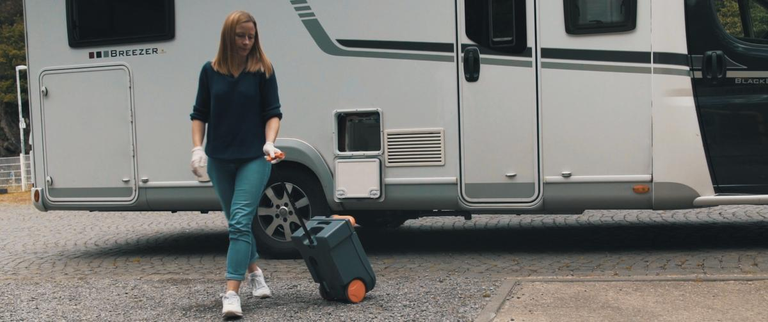
4. Bring the cassette to the chemical disposal point
Most cassettes have wheels and an extendable handle, making it easier for you to take the tank to the dumping station. The handle lets you pull it behind you like a trolley case. Most campsites clearly mark the way to the chemical disposal point.
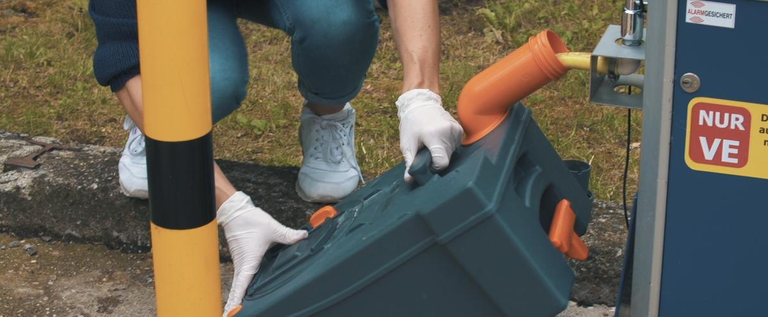
5. Place the cassette above the drain and unscrew the cap
When you get to the chemical disposal point, place the cassette directly above the designated opening (the drain will usually be marked with a WC sign), and then unscrew the cap. To empty the cassette, lift it with one hand on the front handle. Using your other hand, press the ventilation button, then tip the cassette over the drain. Always keep the ventilation button pressed as you empty it; that way, you avoid gurgling and keep waste from splashing out. The button is usually a different colour than the rest of the cassette, and it is located up on the back end. Now you can empty the contents into the drain.
6. Rinse out the cassette multiple times
Once you’ve emptied out the cassette, use the designated hose to rinse it out thoroughly and remove any remaining waste. Repeat this step until it is completely empty, and the water runs clear when emptied.
7. Add sanitary additives and close the cassette again
Before you put the cassette back, you should add chemical, sanitary additives in the form of a liquid or tablet. This isn’t a requirement per se, but it does help with decomposition and keeps odours from forming. If you’d rather avoid chemicals, you can find more information about ecological alternatives at the end of this post. Leave a little water in the cassette for the sanitary additives, and add the appropriate amount of liquid according to the instructions. (In our video, we used Aqua Kem Blue.) Finally, close the opening, and put the cap back on the drainage pipe.
8. Put the cassette back and dispose of your gloves
Once the cassette is clean and empty again, roll it back to your vehicle. You should be able to place it back into the corresponding compartment without much effort, and as you push it in, you’ll notice that it gently clicks into place. As soon as you’ve closed the door to the cassette holder, you can let your fellow campers know that they can now use the toilet again. Your camping toilet shouldn’t be the only clean thing, though — For the sake of other campers, please make sure that the chemical disposal point is tidy when you’re done. If necessary, rinse down the area with the hose, and dispose of your rubbish properly.

The ABCs of toilet chemicals
Sanitary additives are a constant topic of discussion among campers: Opinions regarding the type of chemical or the effectiveness of odour prevention can vary greatly. To help make it easier for you to decide which chemicals to choose, we’ve put together some basic information about sanitary additives for camping toilets for you.
A wide range of choices
On the one hand, there’s a variety of different additives, which can make it harder to choose. On the other hand, more and more campers struggle with the concept of using any chemical substances at all because of ecological concerns. Whether you’re considering chemicals or environmentally friendly alternatives, there are a variety of additives that differ in regard to dosage and usage. Tabs are dropped into the cassette, whereas with powders or liquid concentrates, you must pay close attention to the dosage instructions. Using too much of an additive doesn’t make it more effective — it only has negative environmental effects.
Be careful when handling chemical substances
We recommend that you handle all additives with great care, and ensure that they’re safely stored out of reach of children and animals. Improper use can have negative health impacts, including irritation of the skin, eyes, and airways.
Choosing ecological alternatives
Many campers feel that chemical substances are the only way to reduce unpleasant odours and break down waste effectively. It’s nevertheless worth taking a look at environmentally friendly alternatives. One way to choose additives that are better for the environment is to look at the label: Look for products without formaldehyde.
One example of an ecological alternative is the additive “WC-Mobil” from the brand Awiwa. In Germany, one way you can orient yourself in the decision-making process is by looking for products with the “Blue Angel” ecolabel. Products with this label have been tested and are shown to be more environmentally friendly than their competitors.